The following post is co-written by our friends over at Streamplay, who make awesome Twitch overlays. Check them out!
How To Setup Your Twitch Stream, Part 1: The Basics
If you’re new to the streaming world on Twitch, you’re certainly going to have your work cut out for you. Professional streamers may make it look like they’re raking in the cash just by streaming their favorite video games, but what you don’t see is everything that goes on behind the scenes. If you’ve made it to this guide, you likely already know exactly what we’re talking about, as you plan to setup your own stream on Twitch. Now, let’s go ahead and get started, so you can get your Twitch stream up and running as painlessly as possible. Before you'll ever make it to the bright lights and big city of running your own stream, lets go over the bare basics of what you're going to need.
Hardware You Need
A Solid PC (or Mac)
Basically the newer and faster the better. The more modern the game the higher the requirements. Since this will change over time, I’d say your build should be able to run whatever you’re playing on high settings and still get max (60+) frames per second. You may have to turn down your settings while streaming, but that will give you wiggle room. Streaming taxes your processor a lot more than regular gameplay, so while often times your GPU will be the bottleneck when playing single player, when streaming you may want to invest in a faster CPU. If you plan on streaming from console, a game capture card may improve your performance. That said, if low hardware games like adventure games, visual novels, or 8-bit JRPGs are your thing even a low end computer can stream them effortlessly!
Fast Internet
As above, the faster the better. 5MB/s upload should be enough to get a good clean picture when gaming. I’m a fan of staying wired too, hook up your cat5 cable rather than use wi-fi if at all possible. Check http://www.speedtest.net/ for speed tests.
Microphone (Preferably a ModMic!)

A microphone is something that you’ll absolutely need. Your voice and personality is what’s going to separate you from every other streamers out there. Granted, it shouldn’t be the only thing that separates you from the competition, but it’s going to be one of the major things. Therefore, you’ll want a microphone that will deliver your voice in crystal clear clarity to your viewing audience. Of course we recommend the ModMic, but there are plenty of options out there.
Headphones
A headphones is another important piece of equipment that you’ll have to pick up. After all, you won’t want your gameplay sound coming through your computer speakers, or else your viewers are going to hear a maddening echo that will drive them out of your stream immediately.

Webcam
A webcam can be considered optional, but we’re not going to list it that way. Most streamers out there now display their webcam, and it’s almost become expected of streamers to have a webcam. Therefore, we highly suggest you incorporate a webcam into your stream.
Chromakey Background (Optional)
If you want to get super fancy, you can get yourself a chromakey background. A chromakey background will allow you to have a transparent background while streaming your webcam. Keep in mind, this is an advanced streaming technique, so setting up a chromakey will require additional equipment in order to work properly, and some additional (advanced) software settings.
Software You Need (Pick one)
Streamlabs + OBS (SLOBS) - https://streamlabs.com/
It’s highly recommended that you choose SLOBS as your go-to software when it comes to streaming. It’s highly customizable, user friendly and uses OBS which is the most-used software for streamers. Therefore, it’s already compatible with the top streaming services out there. See our full tutorial on SLOBS in part 2 of Setting up Your First Stream!

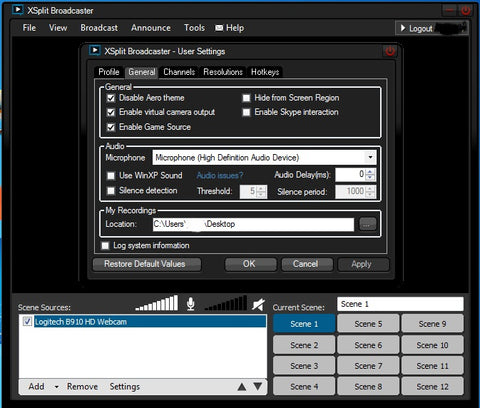
XSplit - https://www.xsplit.com/#gamecaster
This is the second most-used streaming software on the net. If, for whatever reason, you can’t use Open Broadcaster Software, you may want to consider XSplit. However, XSplit does require registration before you can download it, and they do withhold certain features in the free version.
Note: Whether you’re using OBS or Xsplit, accessing the audio settings for either is very simple. All you have to do is click on “Settings,” and then you’ll see an entire section dedicated to audio. From here, it’s usually as simple as selecting your default audio devices. We'll cover this more in a later article.
Create a Twitch Channel:
- Go to http://www.twitch.tv in your web browser.
- Once you’re on the homepage of Twitch, you’ll notice that there’s a link highlighted in purple on the upper-right hand side of the screen labeled “Sign Up.” You’ll want to click on that link.
- Now, a popup will appear on your screen, which is a registration form. If you already have a Twitch account, you can use your login credentials to log into the website.
- After you’re logged in, you can visit the following page to customize your account: https://www.twitch.tv/settings
- From this page, you’ll be able to upload your profile picture, enter your bio information, and a whole lot more. It’s highly advised that you go through this section thoroughly and input all the information you possibly can. This is what will help you make your channel stand out among the rest.
- At any time, you can preview your stream by clicking on the “Profile,” button on the left-hand side of the page. From here, you’ll also be able to upload your profile banner, and edit your stream labels.
Something you should keep in mind:
I hate to be the bearer of bad news, but your stream is never going to be 100% perfect, no matter what you do. Keep in mind that you’re dealing with Twitch lag, game audio, broadcast audio, game video, and usually a webcam, as well. That’s a lot of components, and getting everything in complete synchronicity isn’t going to happen. Maybe your gameplay is a millisecond behind the audio. Maybe your broadcast audio is a decibel level too high. You’re going to have situations like this, and sometimes, you just have to accept it.
The best thing you can do is preview your stream in your broadcast software of choice before you begin streaming. That way, you’ll be able to sort everything out before you go live. Also, tune in to your own stream from time-to-time while it’s live, just to make sure everything's running smoothly. If a few users in the chat say that something’s messed up, you can load up your own stream in a separate browser window and have a look.
However, do remember that users will sometimes try to troll you, so don’t always take their word for everything. Also, your stream isn’t going to look the same to everyone, and you’ll sometimes get perfectionists reporting that they’re having issues. If this happens, just remember what i said above: your stream is never going to be 100% perfect, and you can’t please everyone all the time.
Tune in Next Time for Setting up OBS or Xsplit for Audio and Video and running your first stream!
Continue on to part 2, where we’ll go over the actual settings you may want to use for your first stream, both for audio and video, as well as some pitfalls you may encounter (and subsequently avoid), and of course, actually running you very first stream!

Thanks again to Streamplay for coming up with this article series idea and helping us gather all the information!